Video Tutorial (coming soon)
Text Tutorial
Chat with your Expert
Start to chat with your expert
Firstly click on the “Chat” Menu button on the left. Then click on the “Chat” button of your desired Expert.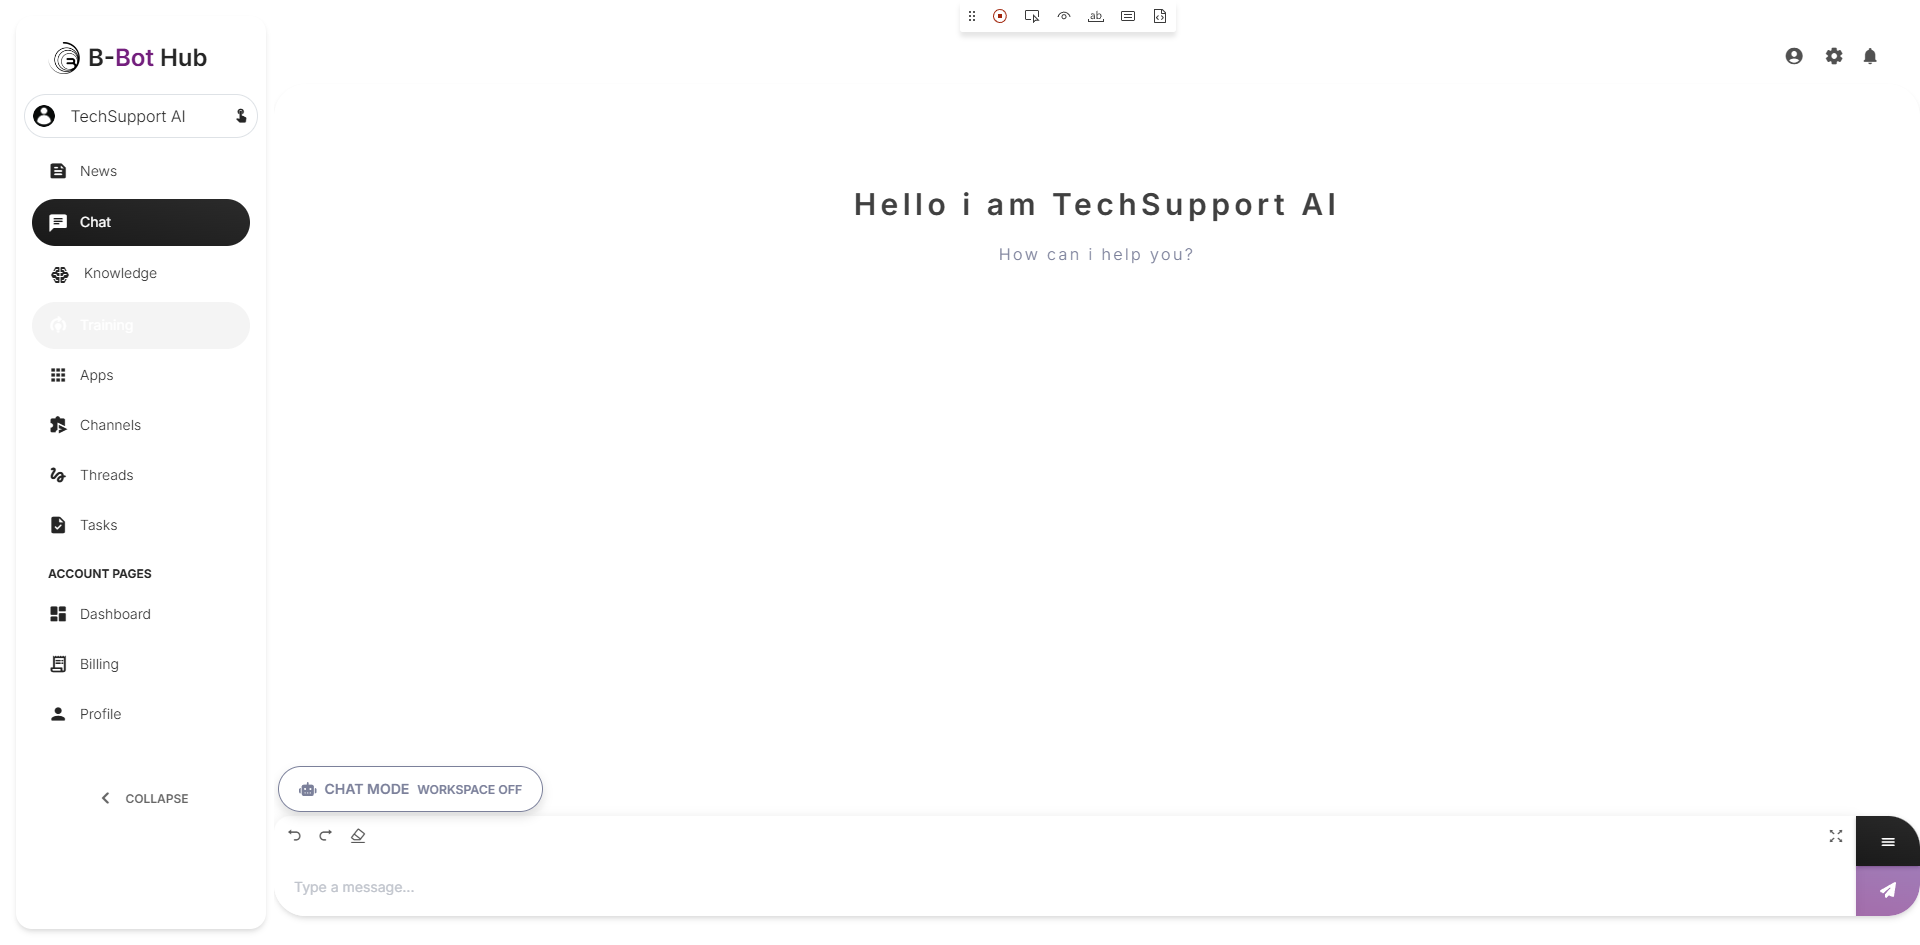
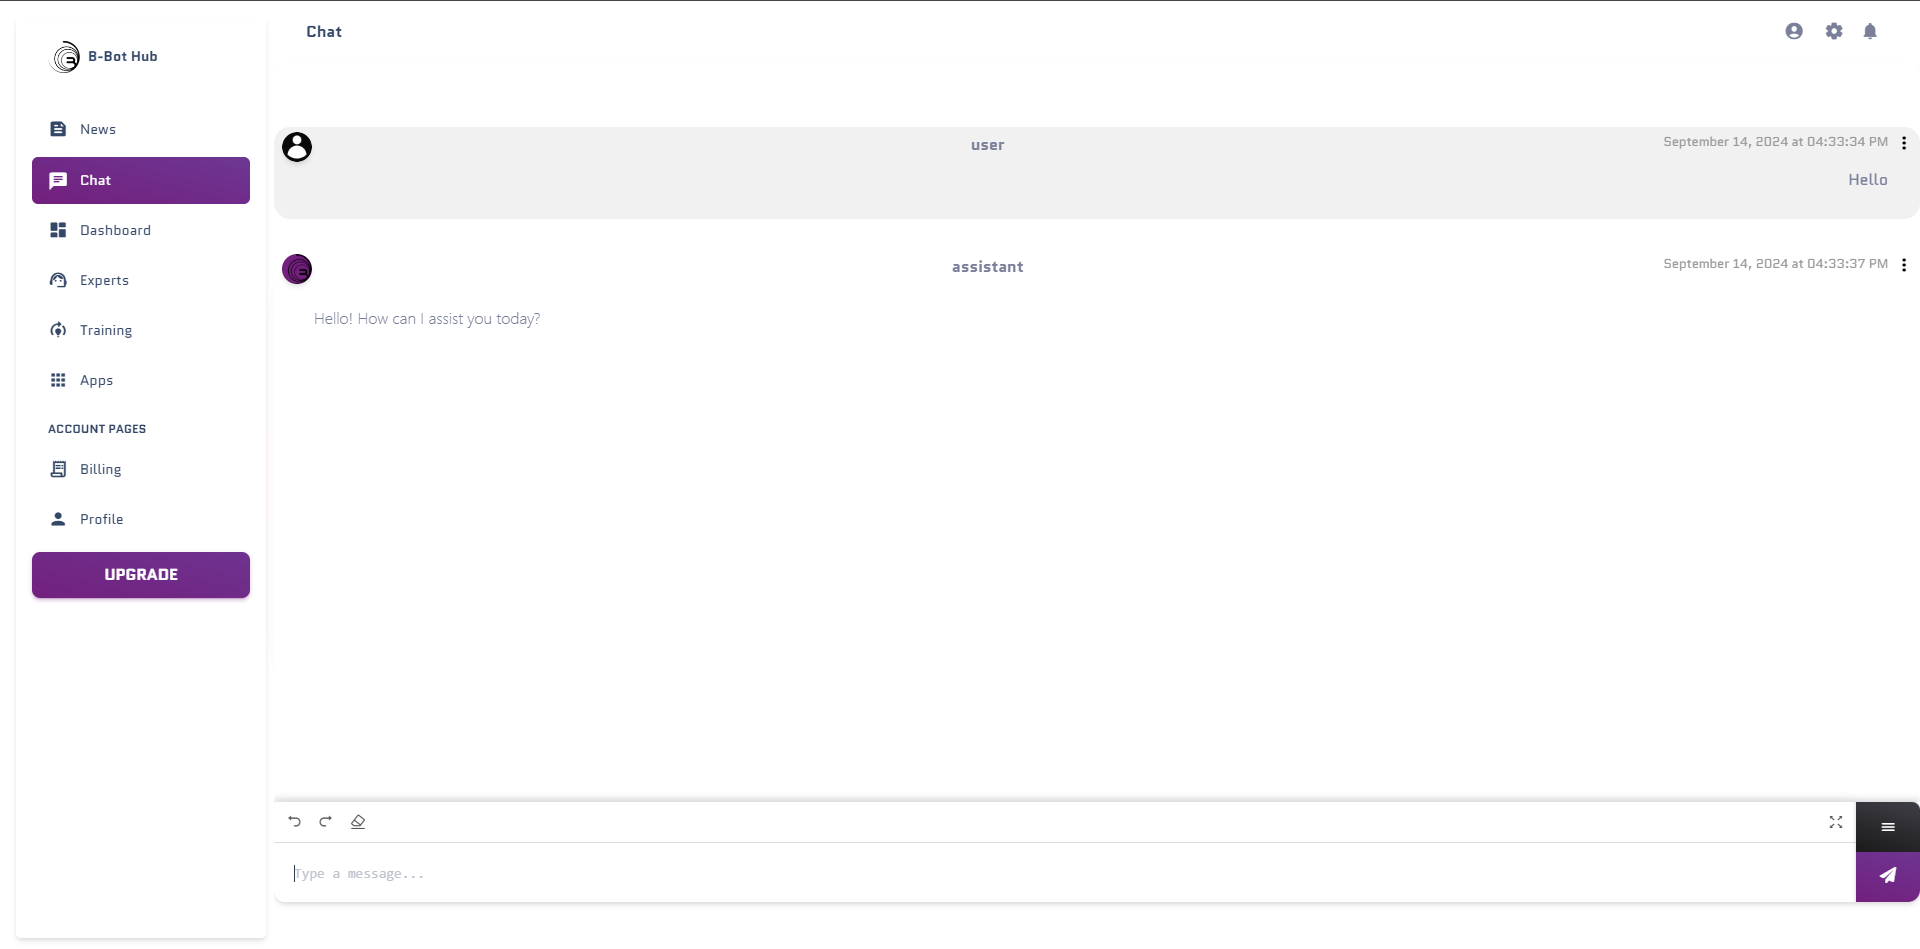
The Chat window
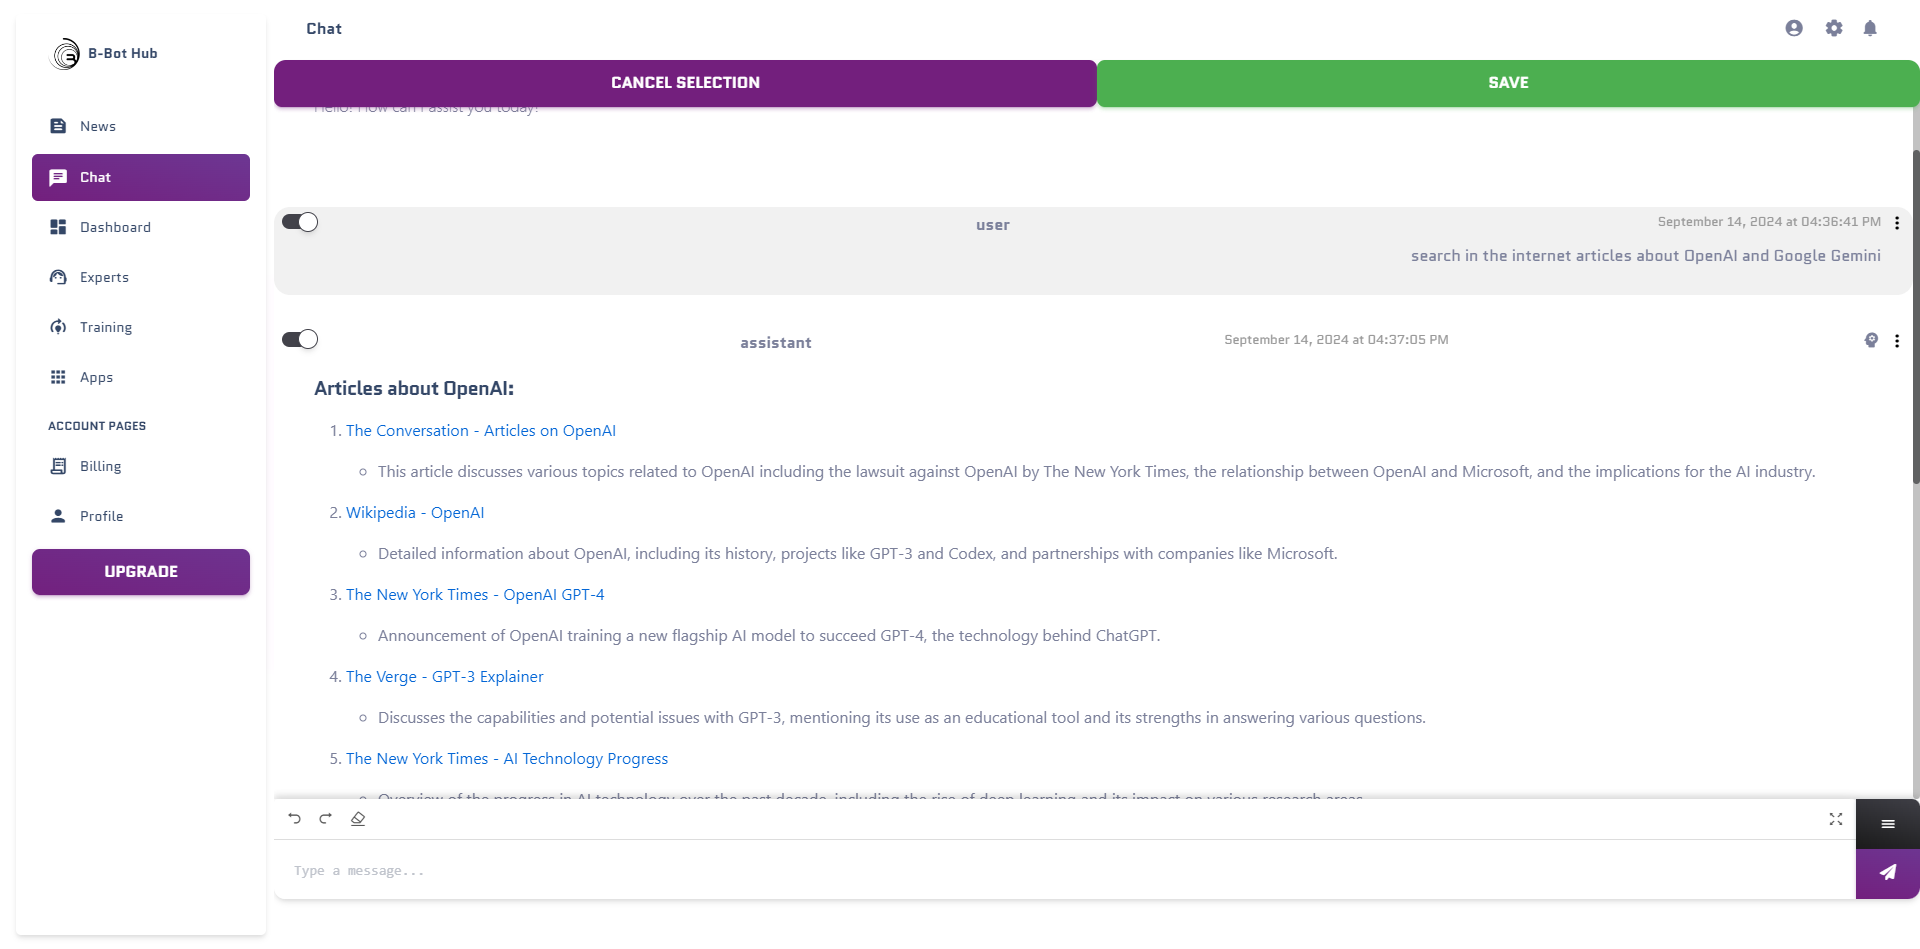
After you clicked on the “Chat” button you will see the chat window. Here you can chat with your expert.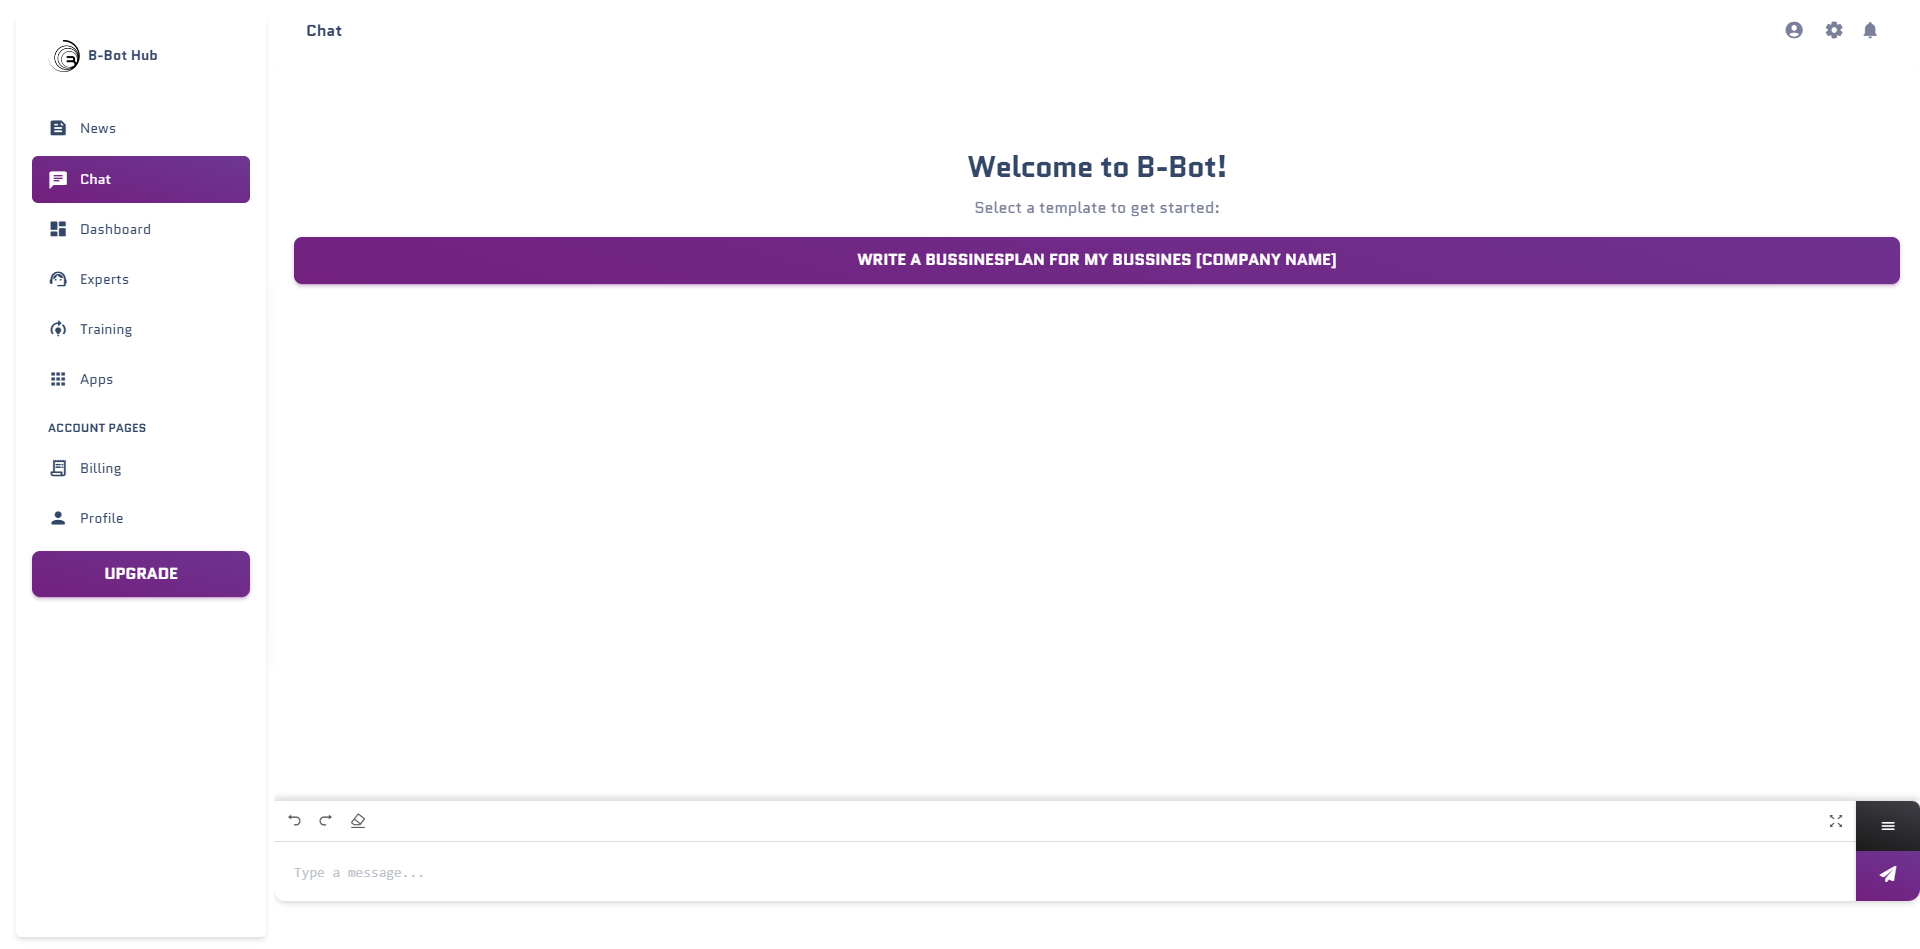
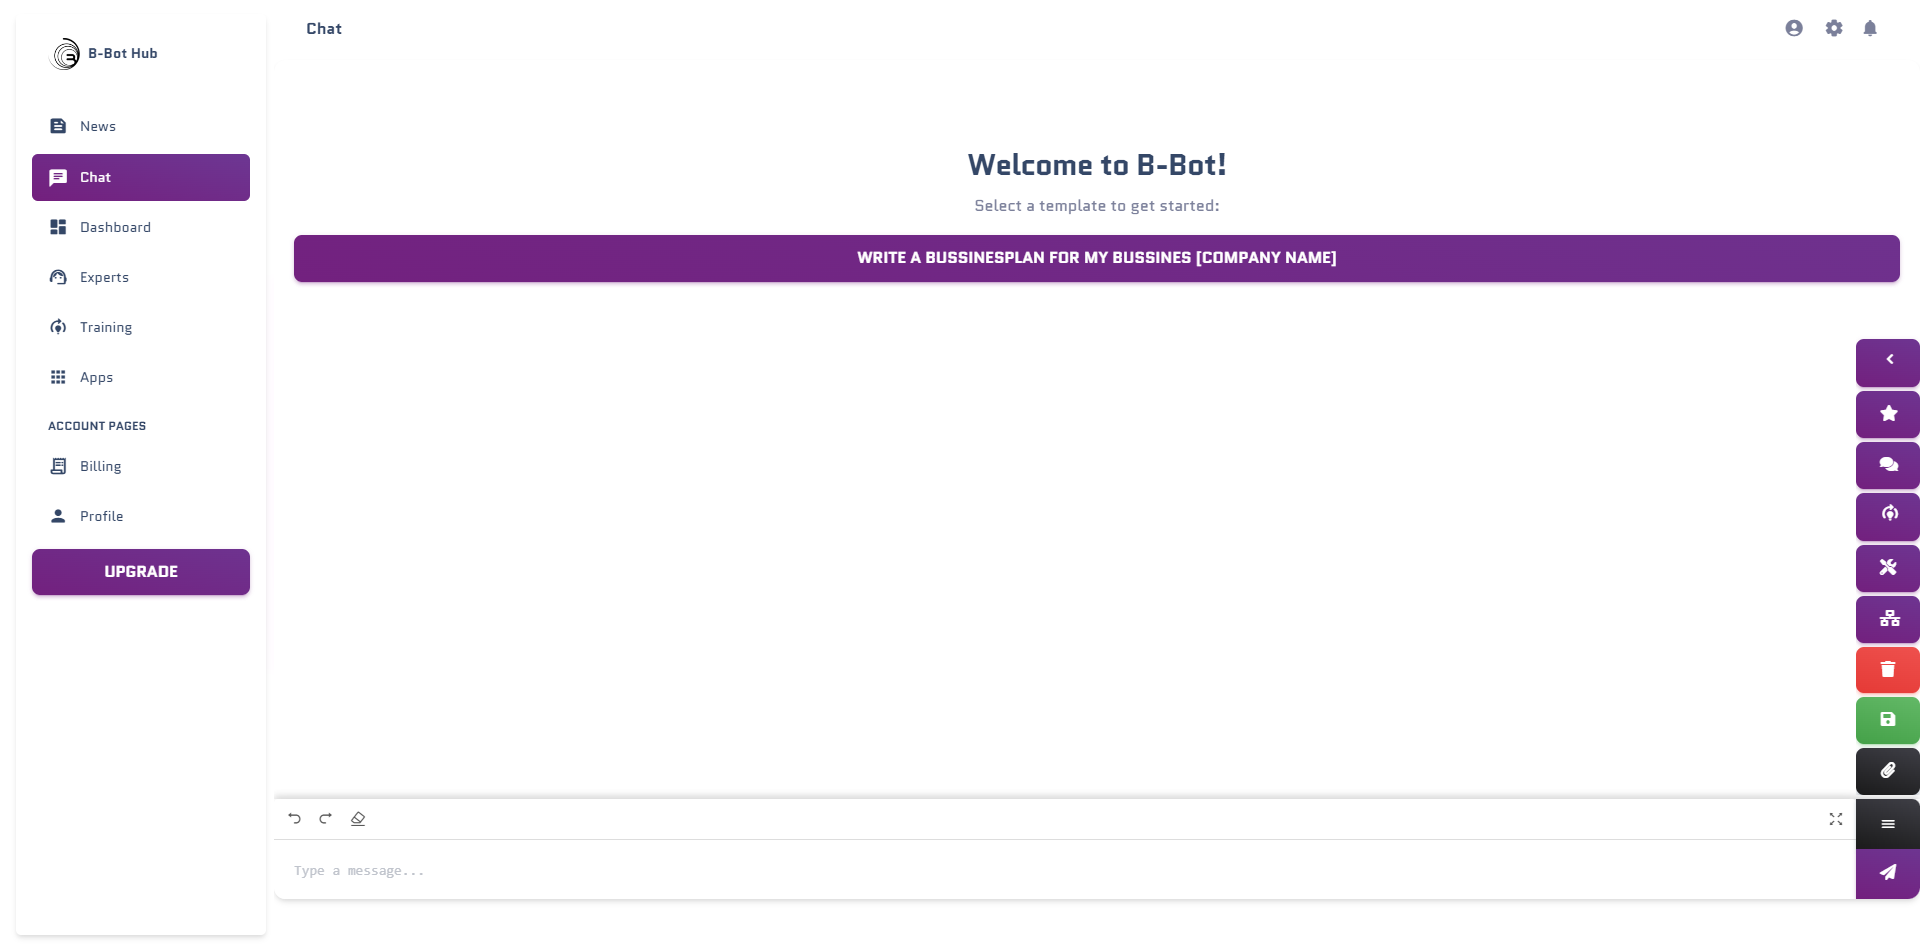
The Thumbbar
The Thumbbar is the place where you can see all of the Chat functions
You can see the following functions in the Thumbbar:- Back Button: Return to the Expert Overview
- Abilities Button: See and activate your expert’s abilities
- Chat History Button: Browse previous conversations
- Model Selection Button: Change the AI model being used
- Settings Button: Configure chat settings (temperature, tokens, etc.)
- Memories Button: View and manage conversation memories
- Tools & Connectors: Enable/disable apps and integrations
- Delete History: Clear messages and start fresh
- Save Chat: Export conversation history
- Upload Files: Add documents, images, or other files
- Voice Mode 🎤: Enable voice input (new!)
- DeepAgents Workspace: Access todos and files (in Deep Mode)
The Abilities Window
You can see all of the abilities of your expert in the abilities window. You can see the name of the ability and the description of the ability. Choose your desired ability with the “use Ability” to activate it.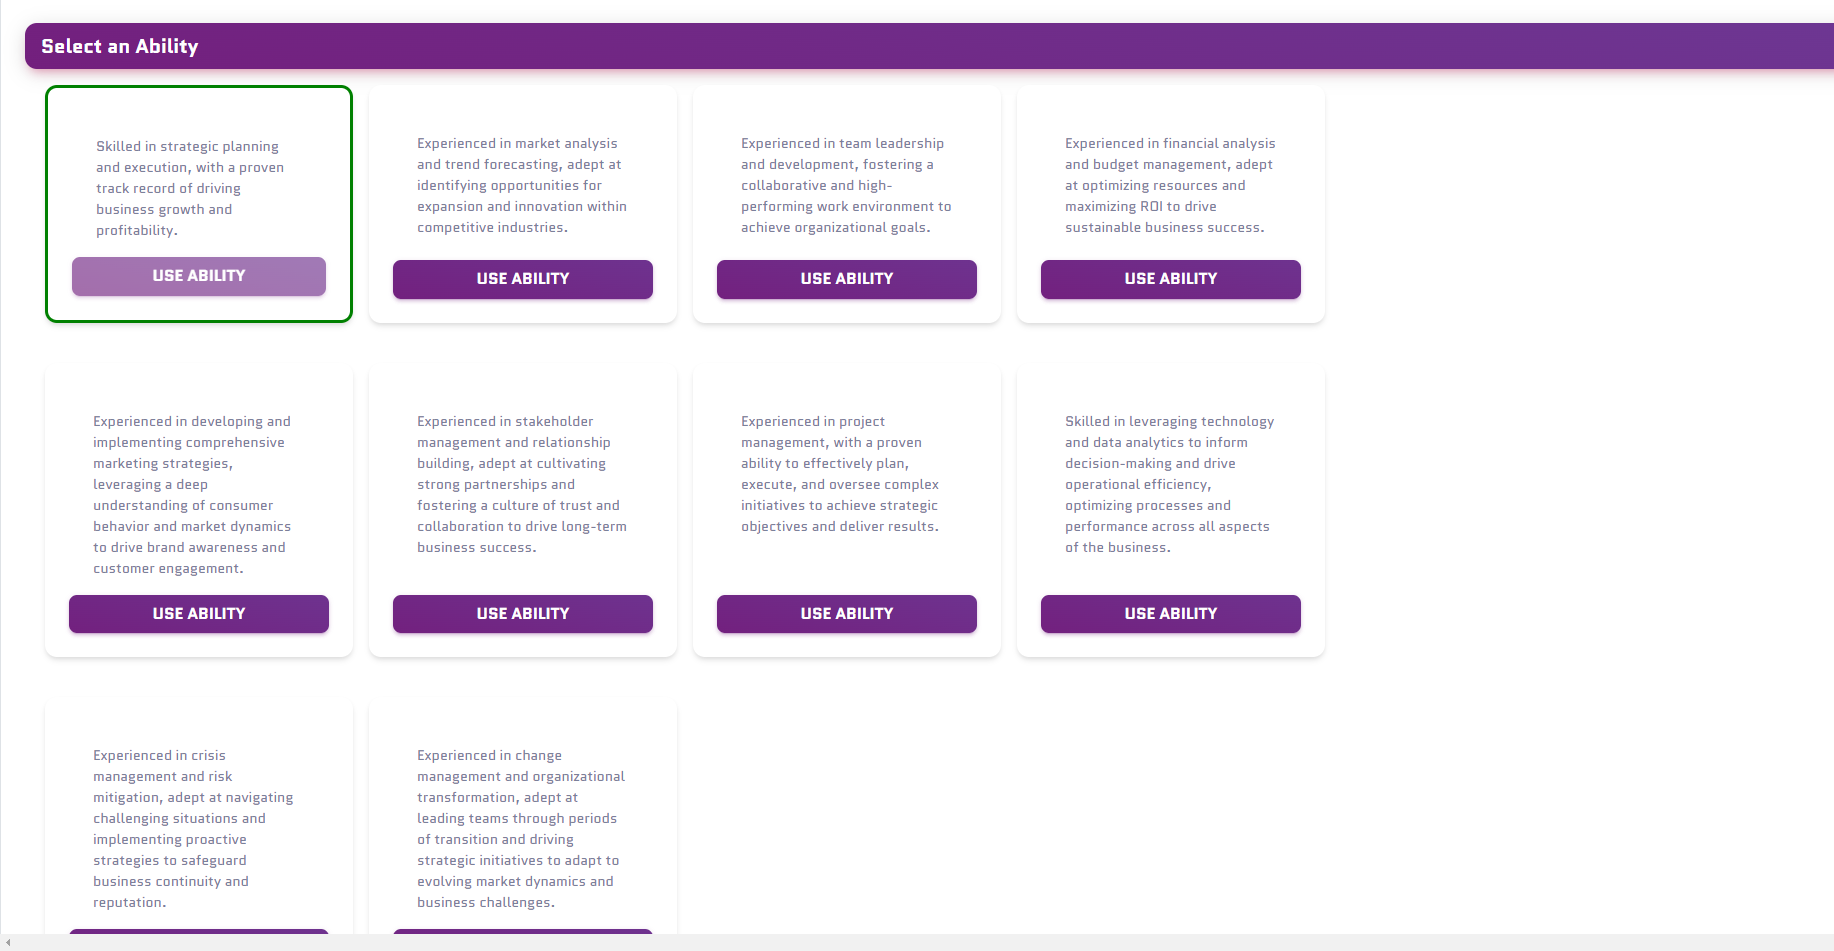
The Chat History
Search for a specific Chat in here and activate it by clicking on it.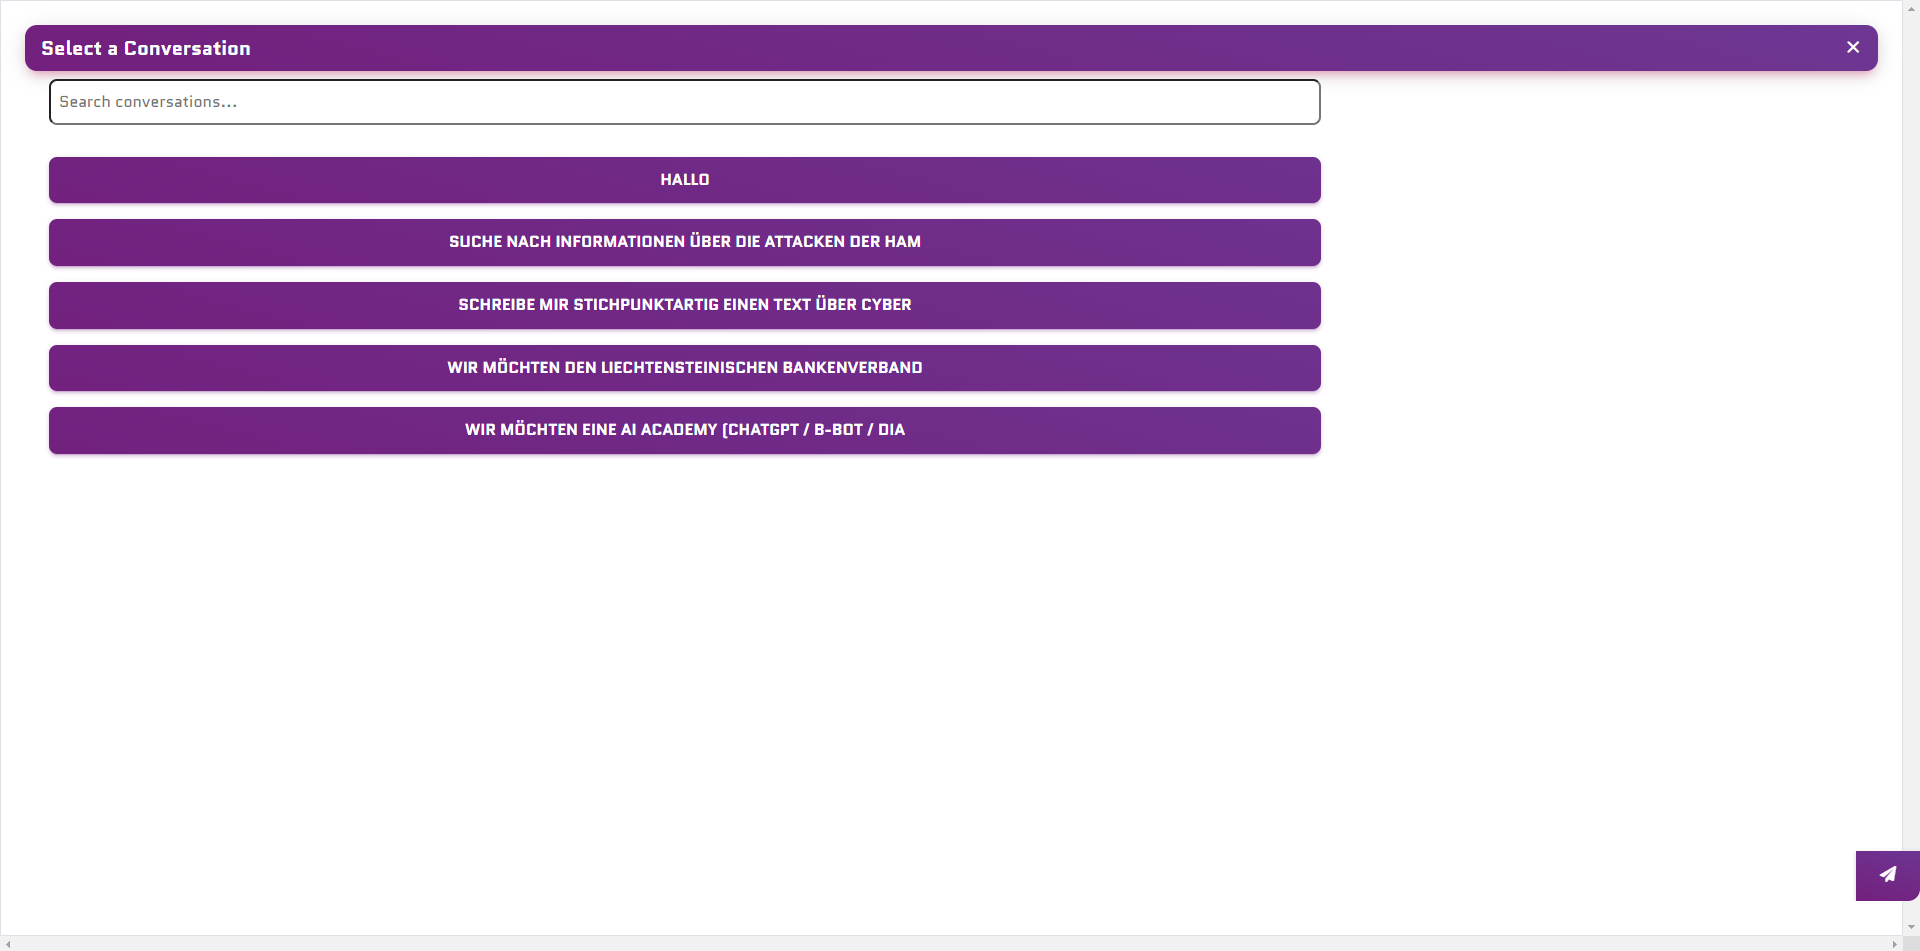
The Model Selection Window
Choose your desired model in here, if you have trained an expert before you can choose between the models you have trained here.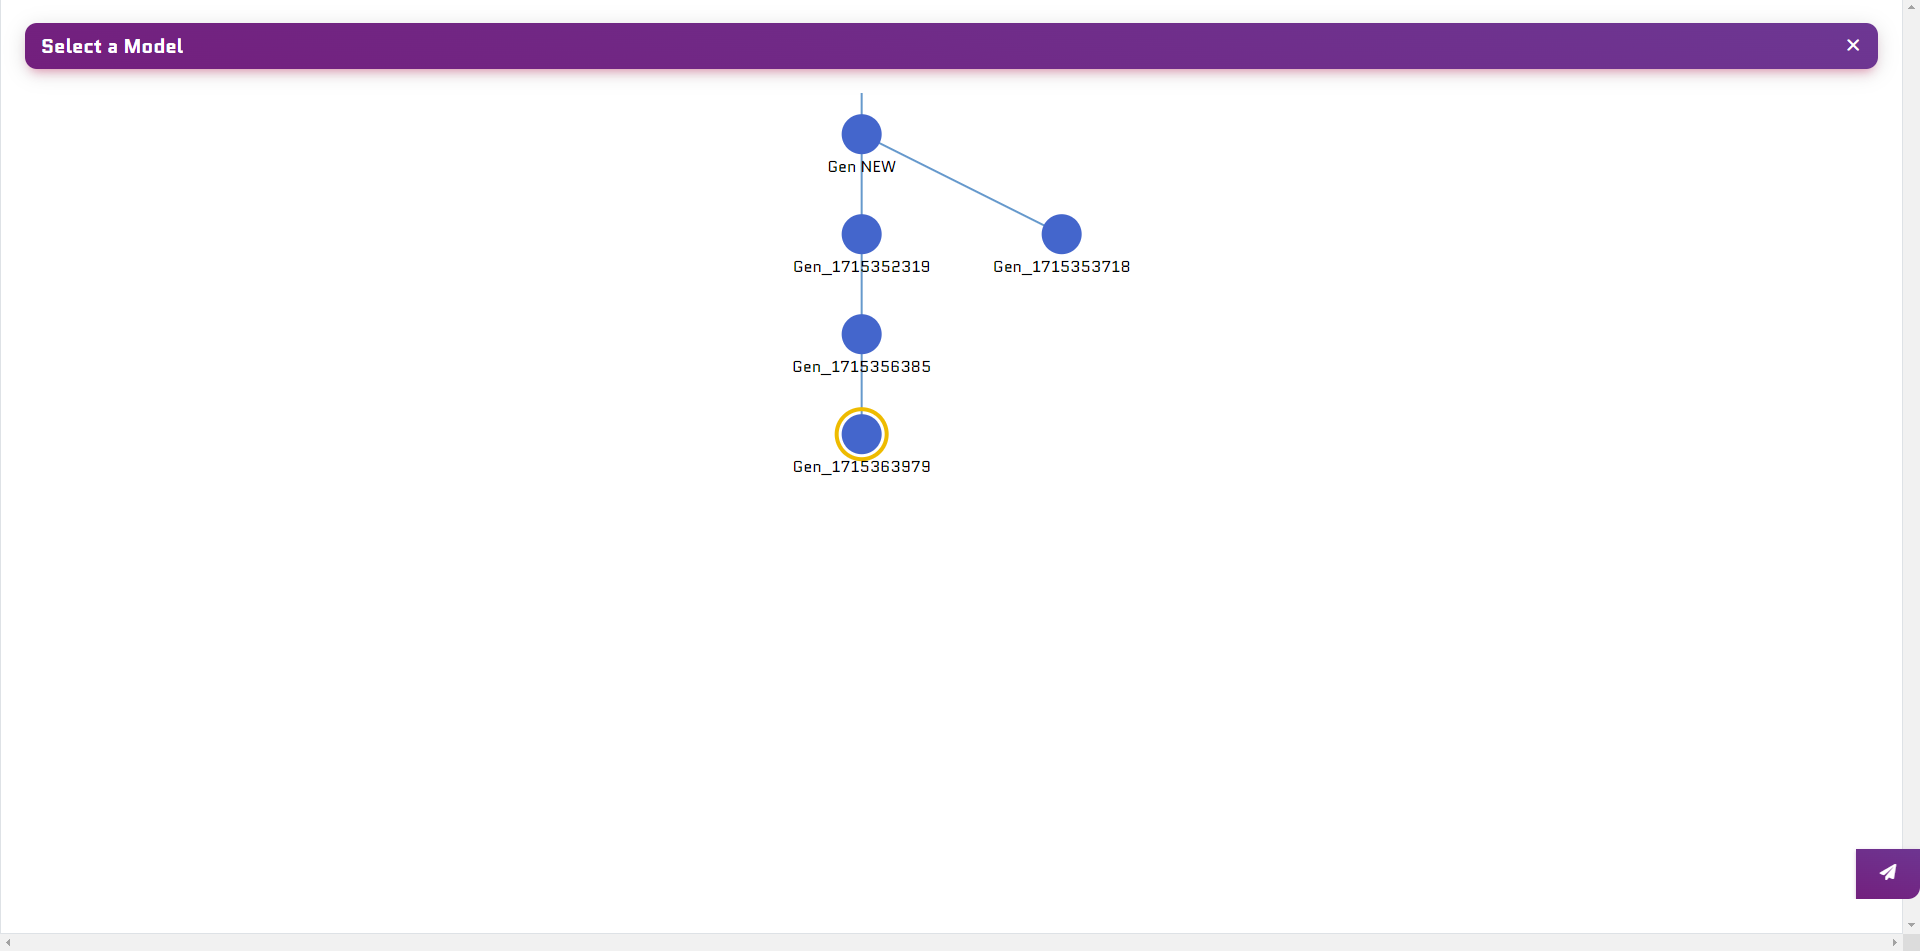
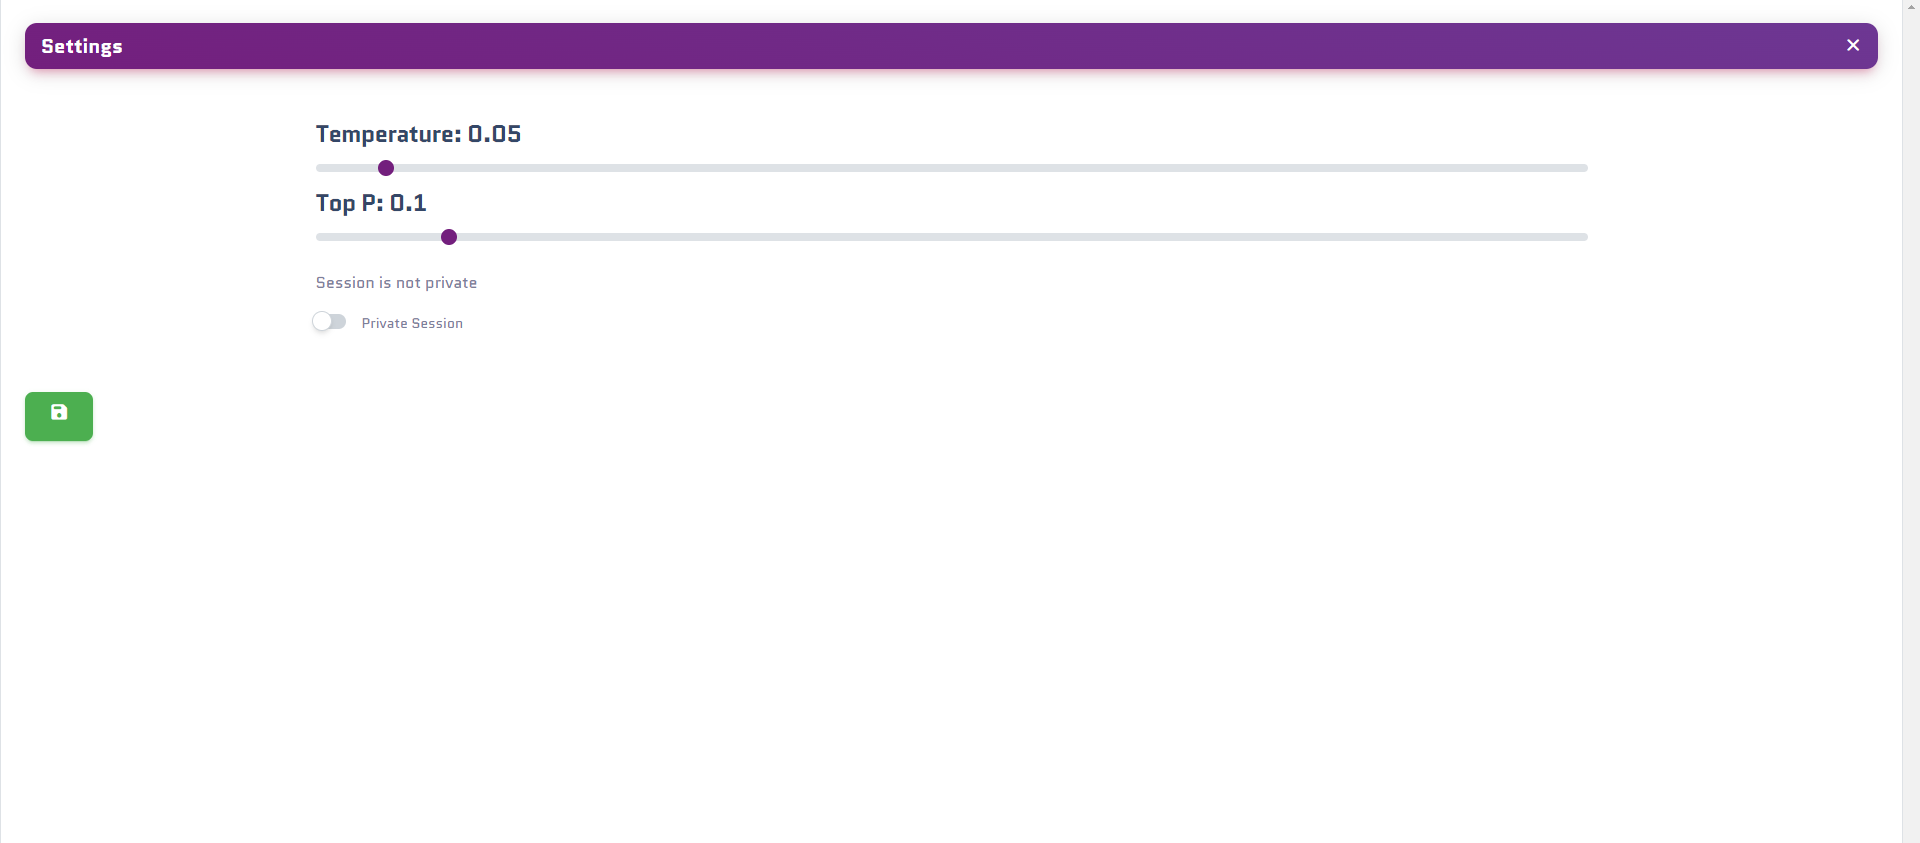
The Settings Window
Change your Settings in here:- Temperature: The temperature of the model
- Max Tokens: The maximum tokens the model can use
- Top P: The top P value of the model
- Privat Session: If you want to have a private session with your expert, this will disable the tools of the expert and will use your private apps
The Tools and Connectors Window
You can see all of the tools and connectors of your expert in here. You can see the name of the tool and the description of the tool. you can also disable or enable the tool in here.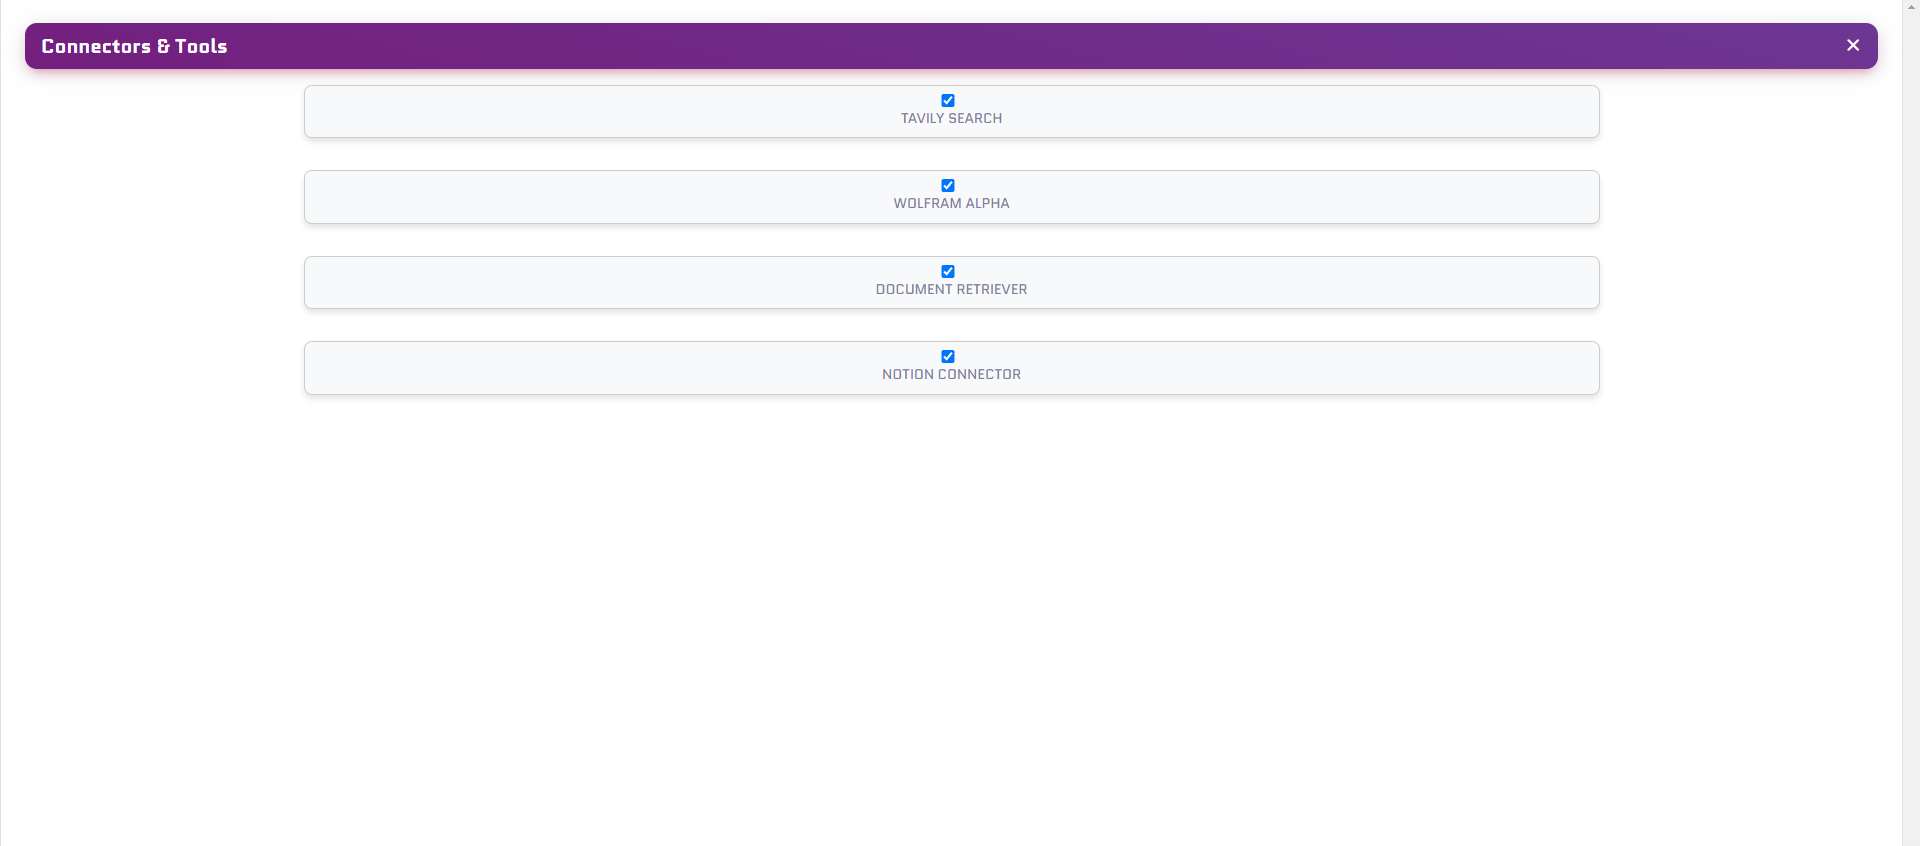
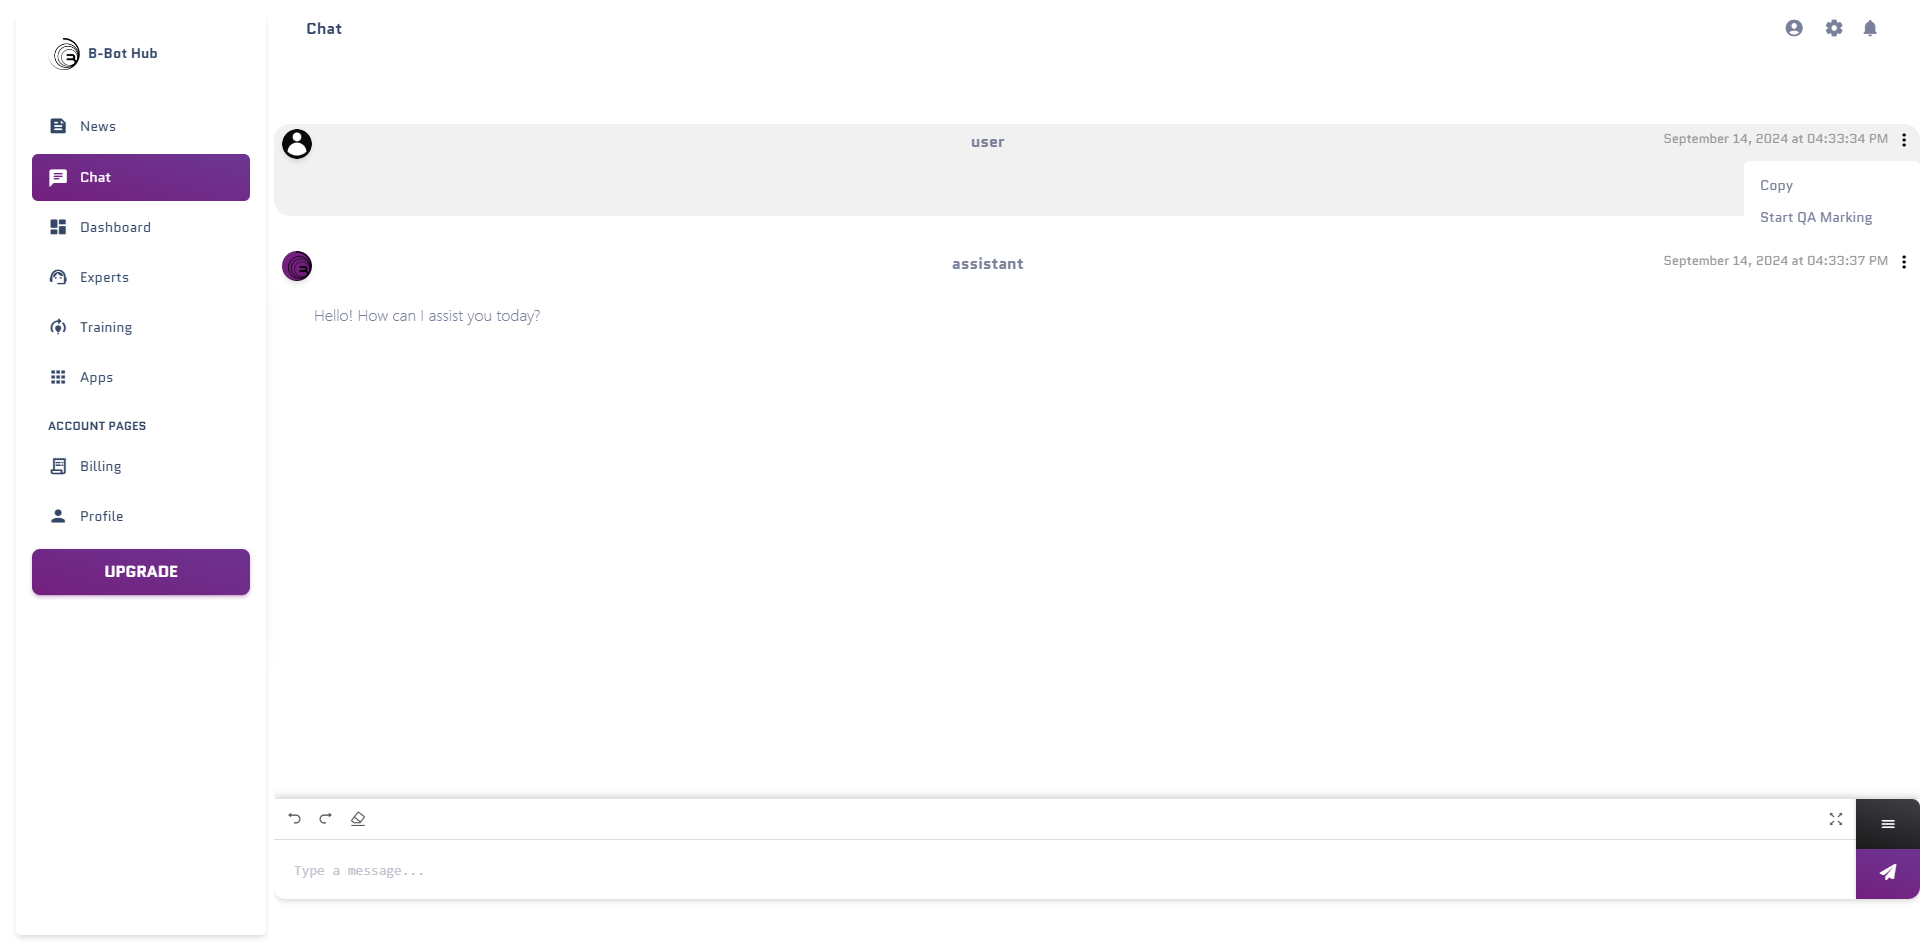
Chat Message functions
The Chat Message functions are in the context popup of every message
The Context Popup for a User message
by clicking on the three dots of a message you can see the following functions:- Start QA Marking: Start the QA Marking for this Chat Messages
- Copy: Copy the message
The Context Popup for a Expert message
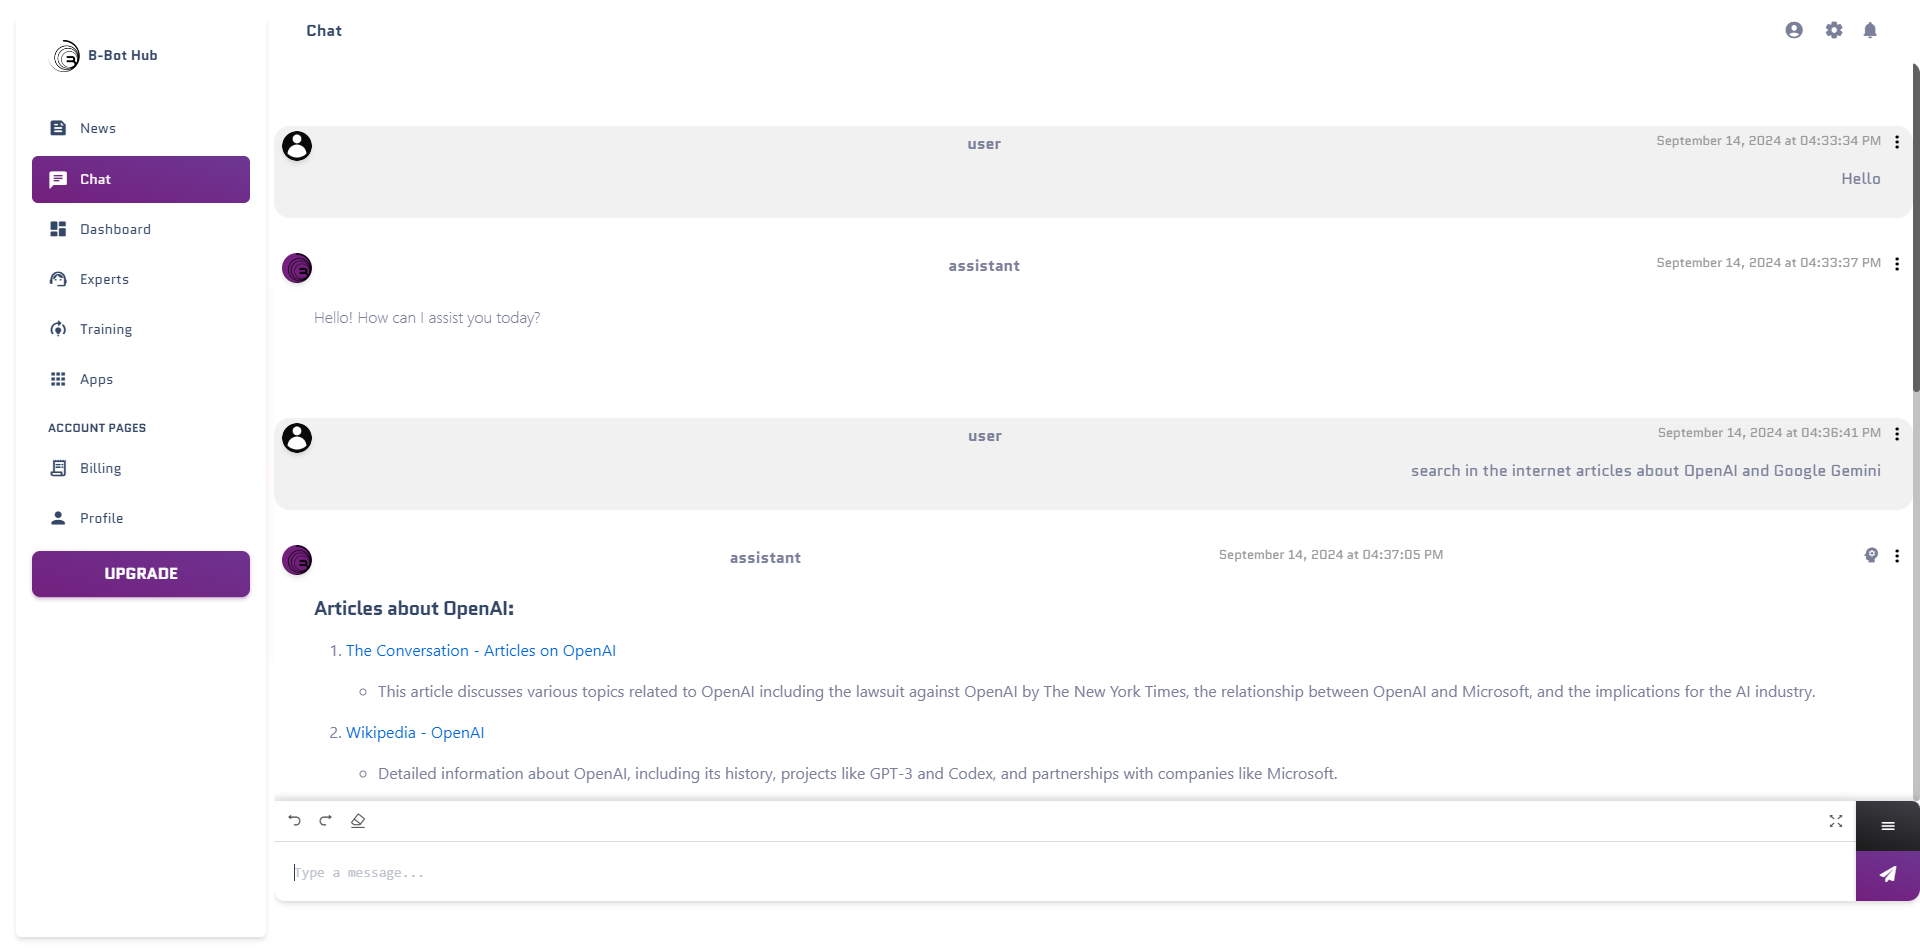
- Start QA Marking: Start the QA Marking for this Chat Messages
- Copy: Copy the message
- Thoughts: If the expert has thoughts about the message you can see them here, thoughts are sometimes tools or connectors the expert used for this message

QA Marking
By enabling the QA Marking you can mark Messages for QA. These Marked QAs will be used to train the expert in the future.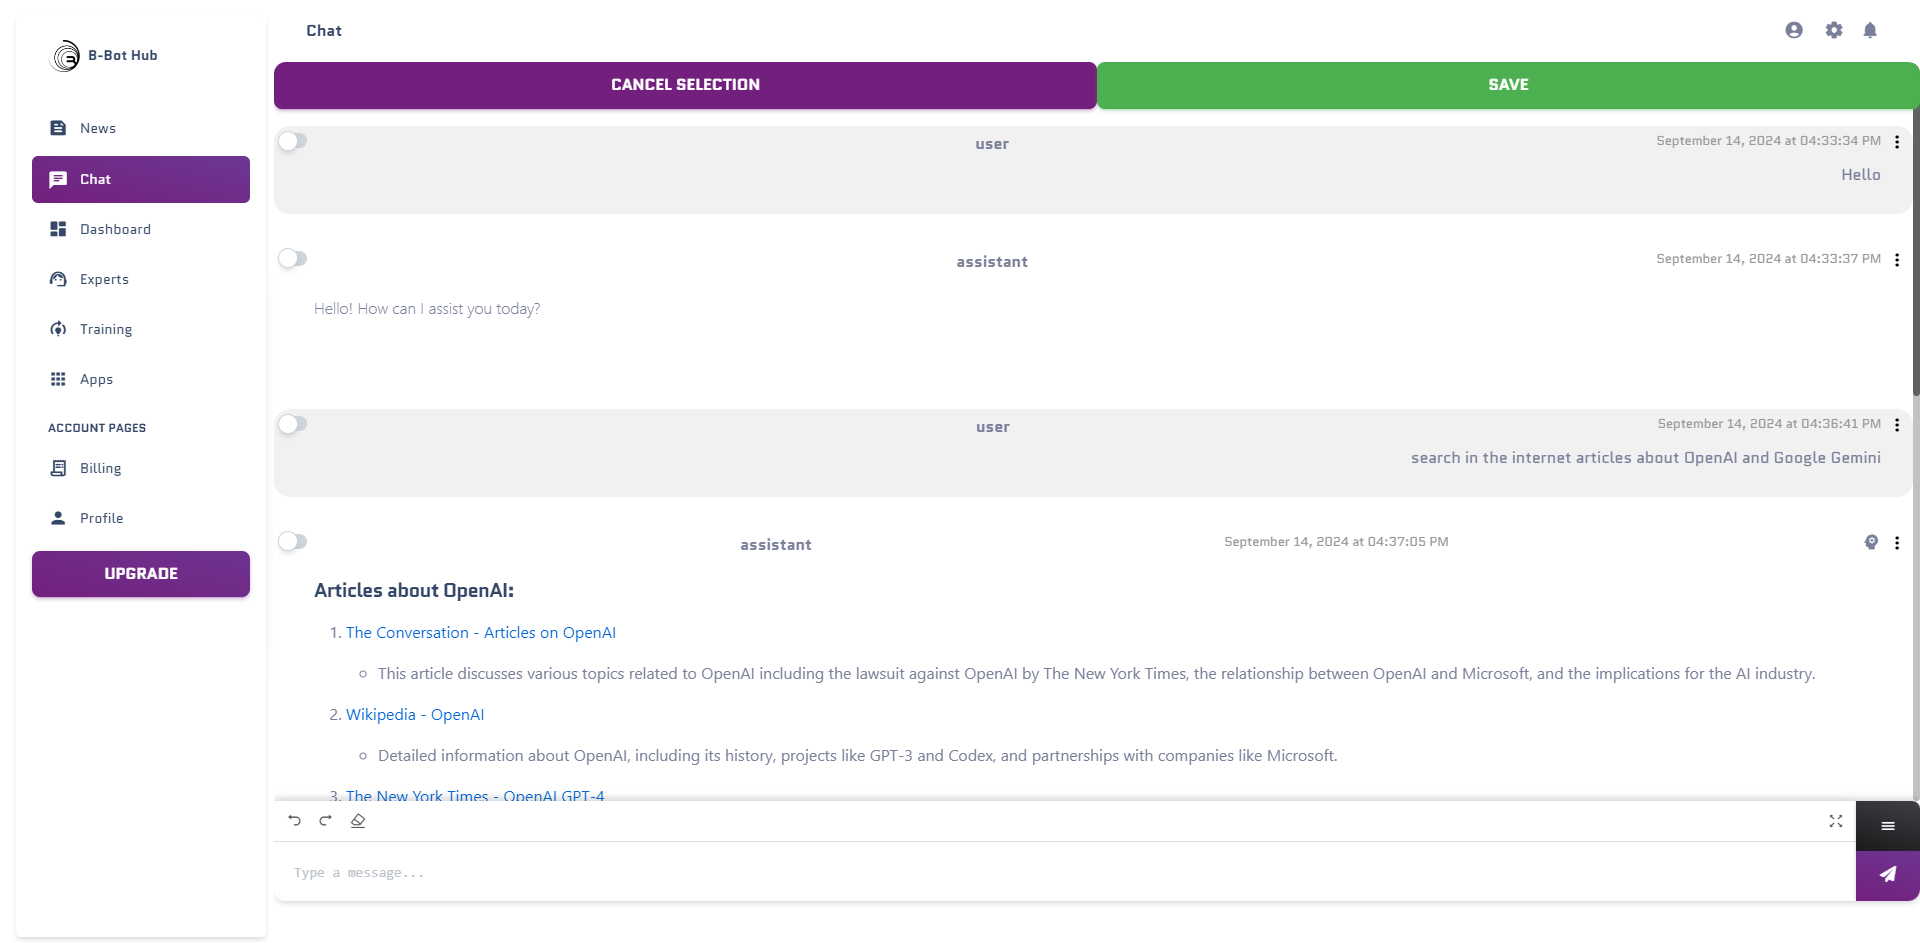
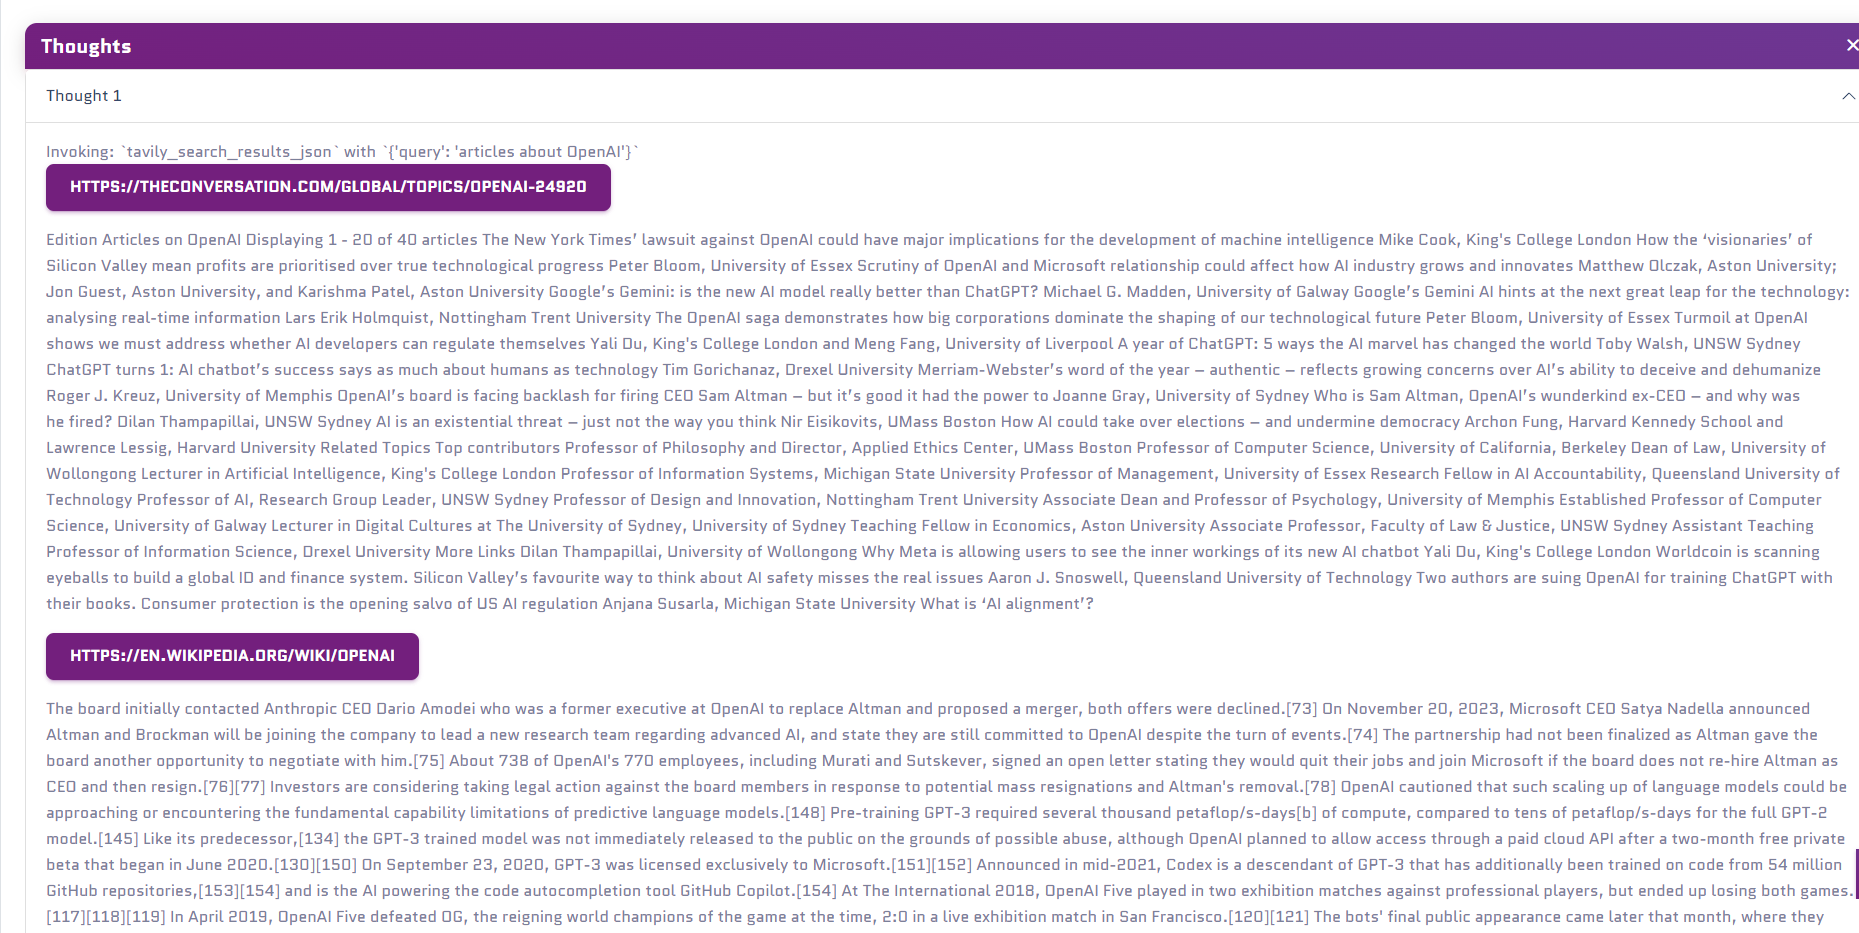
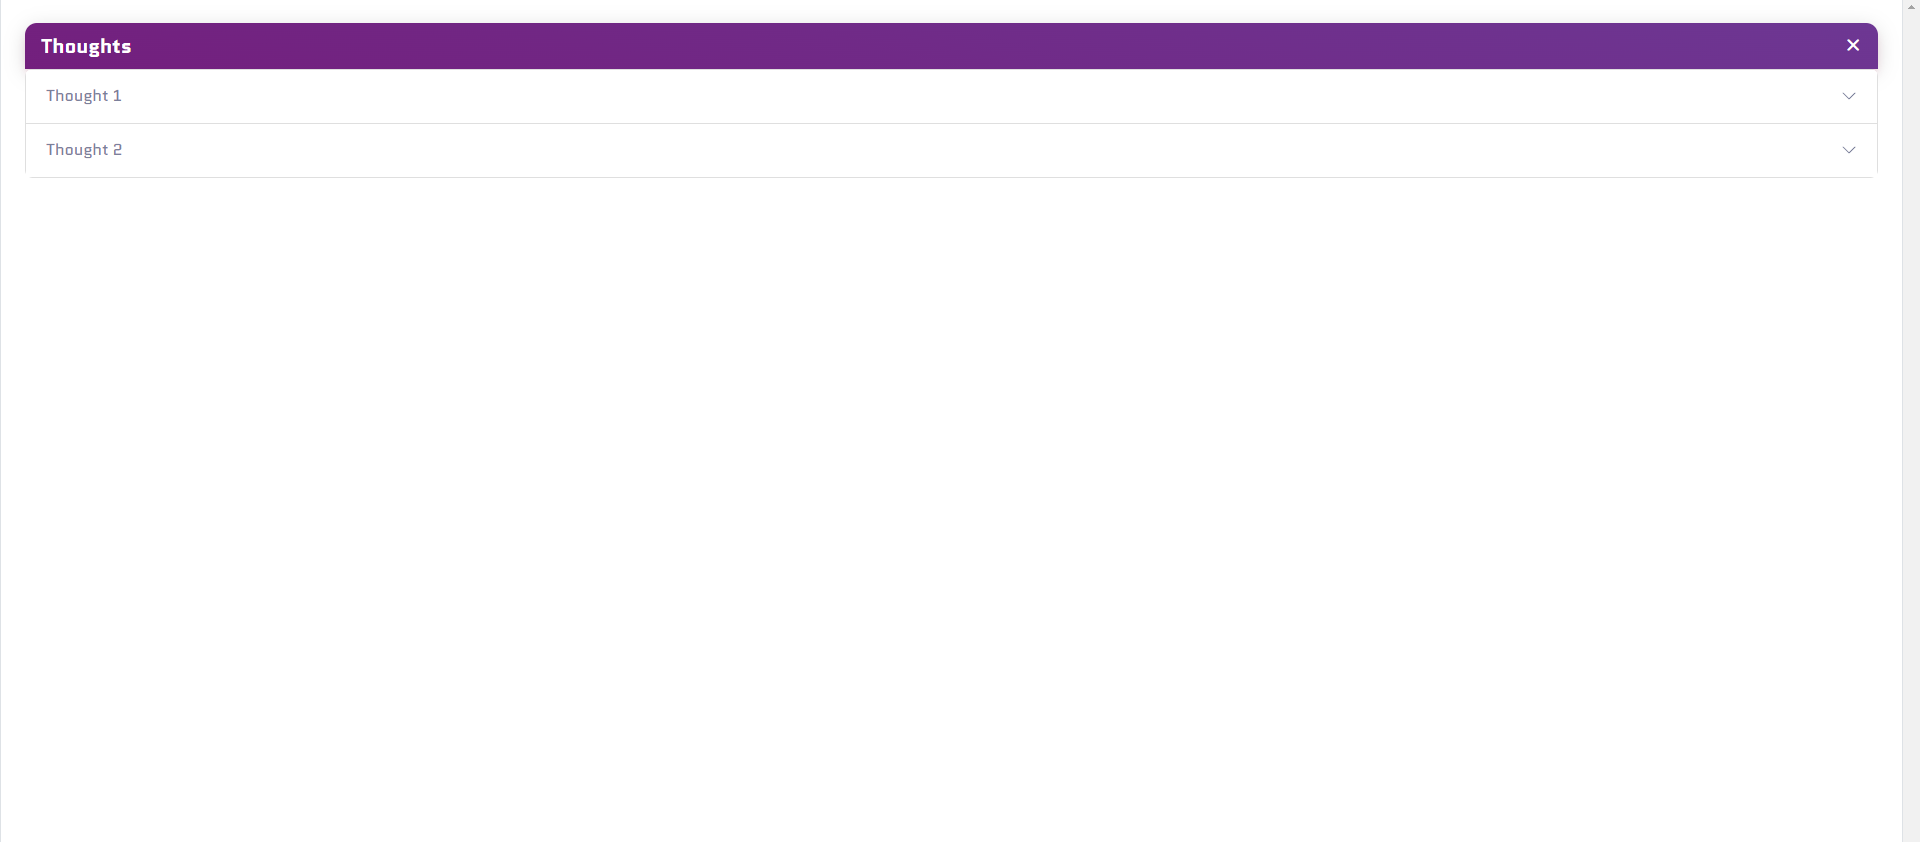
The Thoughts
If you see an Icon like this in the chat window you can see that the expert had thoughts on this message. Thoughts are tools or connectors the expert used for this message.
Here you can see the thoughts of the expert. Thoughts are tools or connectors the expert used for this message.
Voice Features
Voice Input 🎤
Enable voice mode to speak to your expert instead of typing:
Voice Input Tips:
- Speak clearly at a normal pace
- Minimize background noise
- Use a good quality microphone
- Voice is transcribed using AI (OpenAI Whisper or browser native)
Audio Output 🔊
If text-to-speech is enabled, you’ll hear your expert’s responses:- Auto-play: Responses play automatically
- Manual play: Click the play button to hear the response
- Speed control: Adjust playback speed
- Voice selection: Different voices available based on provider
- OpenAI TTS (Alloy, Echo, Fable, Onyx, Nova, Shimmer)
- ElevenLabs (Premium voices)
- Google TTS (WaveNet voices)
- Azure Speech (Neural voices)
- Browser Native (Built-in)
DeepAgents Workspace
What is Deep Mode?
DeepAgents mode gives your expert a persistent workspace with tasks and files:Tasks Management
Create, track, and complete todos
File System
Read, write, and manage files
Enabling Deep Mode
Using the Workspace
The workspace has two tabs: Tasks Tab:- View all todos created by the agent
- Track progress with status indicators
- Add manual tasks for the agent
- Complete or delete tasks
- Hierarchical task structure
- View all files in the workspace
- Edit file contents
- Download files to your computer
- Upload new files
- Organize by type
- 🟢 Completed: Task finished successfully
- 🔵 In Progress: Agent is working on this
- ⚪ Pending: Not started yet
- 🔴 Failed: Encountered errors
- 🟠 Cancelled: Task was cancelled
Multimodal Content
Your expert can handle multiple types of content:Text
Traditional text messages
Voice
Speak your questions
Images
Upload and discuss images
Documents
PDFs, Word docs, text files
Code
Source code files
Data
CSV, JSON, Excel files
Combining Modalities
You can mix different input types in a single message: Example 1: Voice + ImageAdvanced Chat Features
HITL (Human-in-the-Loop) Mode
In Deep Mode with HITL enabled, the agent will ask for approval before taking actions: Auto Mode:Private Session Mode
Enable private session to:- Use your personal app credentials instead of expert’s
- Keep conversations separate from expert’s learning
- Override tool access
- Accessing personal accounts
- Sensitive operations
- Testing without affecting expert
- Using different API keys
Memory System
Your expert can remember information across conversations: Viewing Memories:- Click the brain icon in the top bar
- See all remembered facts and preferences
- Edit or delete memories
- Add new memories manually
- User preferences
- Important facts
- Project context
- Previous decisions
Tool Events
When your expert uses tools, you’ll see:Web Search
Beautiful search result cards with titles, snippets, and relevance scores
API Calls
Clean display of API requests and responses
File Operations
Visual feedback for file reads/writes
Calculations
Math and data processing results
- Click any tool call to expand/collapse
- See request details
- View full responses
- Copy data for your use
Next Steps
Train your Expert
Train your expert to make it smarter
Add Apps to your Expert
Add Apps to your expert to open more possibilities